Ok it's not really a we thing it's just my blog. You can now find us at
http://crazydeliciousfood.wordpress.com/
Friday, October 22, 2010
We've Moved
Thursday, October 25, 2007
Beer Bread
Classic Beer Bread
3 cups flour
2 teaspoons baking powder
1 teaspoon salt
1/4 cup sugar
12 oz. beer
Combine all ingredients.
Pour into greased loaf pan.
Bake at 375 degrees for 50-55 minutes.
** Add 2 tablespoons of desired seasonings for extra flavor!
Wednesday, October 24, 2007
Dorrito Chicken


1 Egg + 1 T water
2 boneless skinless chicken breasts
3/4 cup crushed baked Doritos - I put them in the mini chopper
Spray a baking pan with pam
Preheat oven to 350
Dip chicken in Egg wash and coat in Doritos
Bake for 25 minutes or until cooked through.
Thursday, October 18, 2007
Happy National Chocolate Cupcake day!!!
Now this is a food holiday I can appreciate! mmmm.
Every once in awhile I read about national food holidays and in honor of national chocolate cupcake day I decided to look a little harder. You would not believe how many national food holidays there are. Did you know that October 14th is National Chocolate Covered Insects Day? Whew, glad I waited until the 18th to check out food holidays. Maybe I'll celebrate it next year or ... maybe not (I wish you could see my little kid yuck face right now). I feel like I dodged a bullet by not investigating food holidays four days earlier. I also lucked out and missed Moldy Cheese day October 9th, or did I? I had some moldy cheddar in my fridge right around that time ... damn you cheese you knew it was moldy cheese day, that's why you ruined my plans for dinner last week
Actually, this whole food holiday thing is very interesting especially in how October has directly related to things in my cooking life. Lets look at the following examples.
*October is National Chili Month - no wonder I've been craving chili all month (I made it last Friday)
*October is National Cookie Month (Oct 1st was also homemade cookie day) - I bought a cookie cookbook and have made quite a few batches of cookies this month
*National Dessert Month - I'm over flowing with desserts ... Chocolate cake, donuts (you'll see that post later today), Purple Rain Cupcakes and that's what I've made in the last week ie still fresh
*I already told you about the moldy cheese right around moldy cheese day
*Last week was American Beer week - G bought some Sam's Octoberfest (ok ok that's not a HUGE coincidence)
*It's National Apple Month - I went apple picking yum! (It's also Caramel month ... no wonder they put that crap on the apples ... I luv my candy apples and am at war with caramel apples)
Ok ok you get the picture, they plan these holidays around the right time. My question is why isn't October National PUMPKIN month?!?!?! Granted there are a few pumpkin days, but come on, there is nothing better in October than pumpkin everything ... bread, cookies, pie, ravioli, you name it pumpkin tastes good in it this time of year.
National Holiday Forcast (ie upcoming days to look forward to)
October 23 - National Boston Creme Pie Day
October 24 - Good n' Plenty Day
October 25 - National Greasy Foods Day
October 26 - Pumpkin Day AND Pretzel Day (anyone have a recipe for pumpkin pretzels?)
October 27 - National Potato day and American Beer Day
October 28 - National Chocolate Day
October 30 - Buy a Donut Day
October 31 - National Candy Apple Day (w00t w00t screw those caramel apple wannabes)
As you can see, next week is looking like a damn good week full of my favorite foods! I believe November has some good things in store for us as well. National Clean out your Fridge day is Nov 15th ... def something to look forward to. Maybe I'll have a fridge cleaning fast until then ... no cleaning for a month. Can you see my eyes lighting up?
So you want to know about MORE food holidays? The most comprehensive list I found quickly is here
Wednesday, October 17, 2007
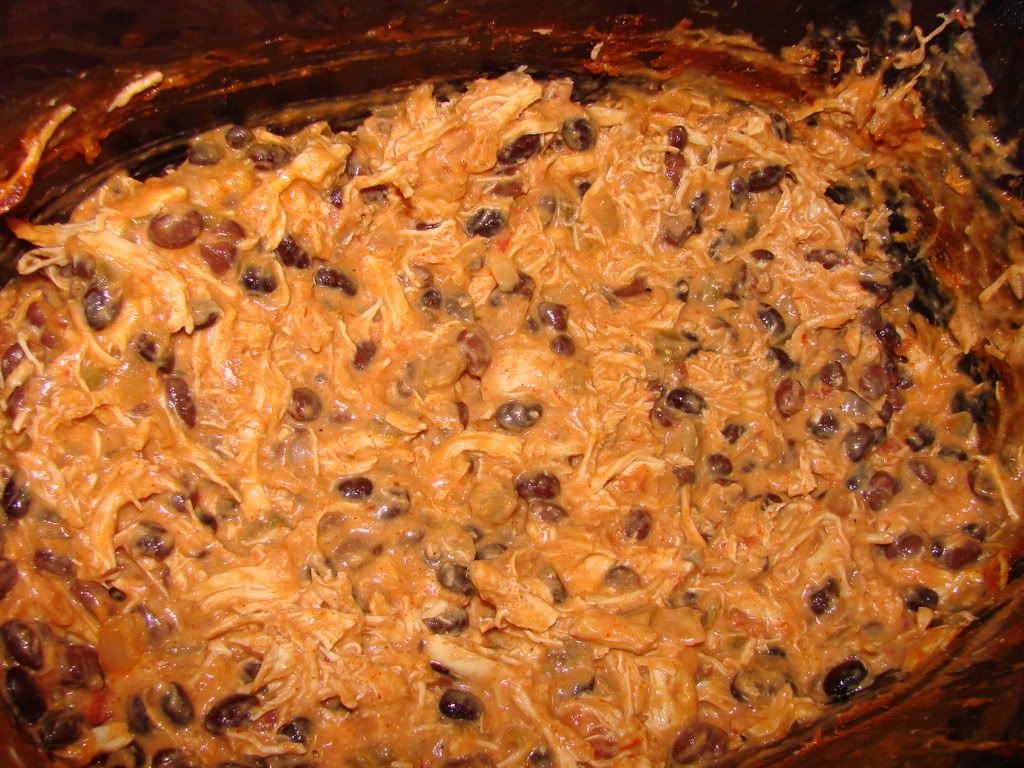
Crockpot Salsa Chicken
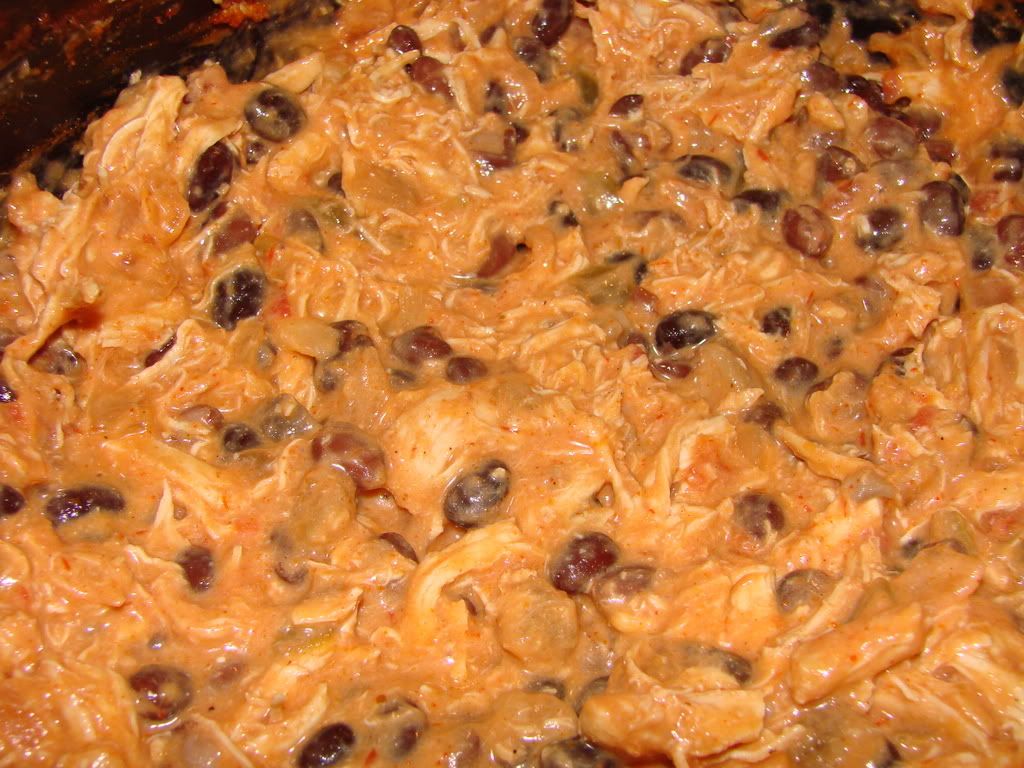
Stolen from sparkpeople.com
4 chicken breasts - put in frozen if you're worried about overcooking
1 can cream of mushroom soup
1 packet reduced sodium taco seasoning
1 16 oz jar salsa
1 can corn
1 can rinsed and drained black beans
1 cup reduced fat sour cream
Mix soup, salsa, and taco seasoning together and pour over chicken. Cook on low for 8-10 hours. Before serving, shred the chicken, add corn, beans, and sour cream. Cook for a few more minutes until everything is heated through. Serve with tortilla chips or in a tortilla.
Monday, October 15, 2007
Hershey's Prefectly Chocolate Chocolate Cake (and frosting)

I liked this cake, but I still like chocolate cake from a box better. The What's Cooking? board raves about it, but it just wasn't my fav. I guess it's one of those things where if you grow up on cake from a box sometimes you'll always love cake from a box. Mmmm Betty Crocker
Stolen from Hershey's (of course)
Hershey's "Perfectly Chocolate" Chocolate Cake
Ingredients:
- 2 cups sugar
- 1-3/4 cups all-purpose flour
- 3/4 cup HERSHEY'S Cocoa
- 1-1/2 teaspoons baking powder
- 1-1/2 teaspoons baking soda
- 1 teaspoon salt
- 2 eggs
- 1 cup milk
- 1/2 cup vegetable oil
- 2 teaspoons vanilla extract
- 1 cup boiling water
- "PERFECTLY CHOCOLATE" CHOCOLATE FROSTING(recipe follows)
Directions:
1. Heat oven to 350°F. Grease and flour two 9-inch round baking pans.
2. Stir together sugar, flour, cocoa, baking powder, baking soda and salt in large bowl. Add eggs, milk, oil and vanilla; beat on medium speed of mixer 2 minutes. Stir in boiling water (batter will be thin). Pour batter into prepared pans.
3. Bake 30 to 35 minutes or until wooden pick inserted in center comes out clean. Cool 10 minutes; remove from pans to wire racks. Cool completely. Frost with "PERFECTLY CHOCOLATE" CHOCOLATE FROSTING. 10 to 12 servings.
VARIATIONS:
ONE-PAN CAKE: Grease and flour 13x9x2-inch baking pan. Heat oven to 350° F. Pour batter into prepared pan. Bake 35 to 40 minutes. Cool completely. Frost.
THREE LAYER CAKE: Grease and flour three 8-inch round baking pans. Heat oven to 350°F. Pour batter into prepared pans. Bake 30 to 35 minutes. Cool 10 minutes; remove from pans to wire racks. Cool completely. Frost.
BUNDT CAKE: Grease and flour 12-cup Bundt pan. Heat oven to 350°F. Pour batter into prepared pan. Bake 50 to 55 minutes. Cool 15 minutes; remove from pan to wire rack. Cool completely. Frost.
CUPCAKES: Line muffin cups (2-1/2 inches in diameter) with paper bake cups. Heat oven to 350°F. Fill cups 2/3 full with batter. Bake 22 to 25 minutes. Cool completely. Frost. About 30 cupcakes.
"PERFECTLY CHOCOLATE" CHOCOLATE FROSTING
1 stick (1/2 cup) butter or margarine
2/3 cup HERSHEY'S Cocoa
3 cups powdered sugar
1/3 cup milk
1 teaspoon vanilla extract
Melt butter. Stir in cocoa. Alternately add powdered sugar and milk, beating to spreading consistency. Add small amount additional milk, if needed. Stir in vanilla. About 2 cups frosting.
Sunday, October 14, 2007
Purple Rain Cupcakes (aka Teal velvet cupcakes with purple frosting)
Shout out to Rach for naming these super cool cupcakes
Who said Red Velvet Cupcakes have to be red? Certainly not me. I wouldn't try changing the color with regular old food coloring, but if you have cake frosting colors go for it. Those things pack a color punch like no other and were able to cover the light brown color with ease.
I'm still up in the air on ______ Velvet Cupcakes. I had never tried Velvet cake before our wedding cake tasting and lets just say their Red Velvet left a lot to be desired. It was soggy, runny and it felt like someone had used it as a sponge to sop up a water spill yuck yuck yuck But I figured that with how much people rave about them, they had to be better than that, and my cake place just sucked (ok they did a good job with my wedding cake but if it hadn't been free I would have gone elsewhere). These were pretty good, but the buttermilk in them is something I'm not used to and was semi confusing to my taste buds, but I liked them quite a bit and I would bet good money that they'll be gone in no time. Now, I'm off to frost them (of course I had to try them before they were cool enough to frost)
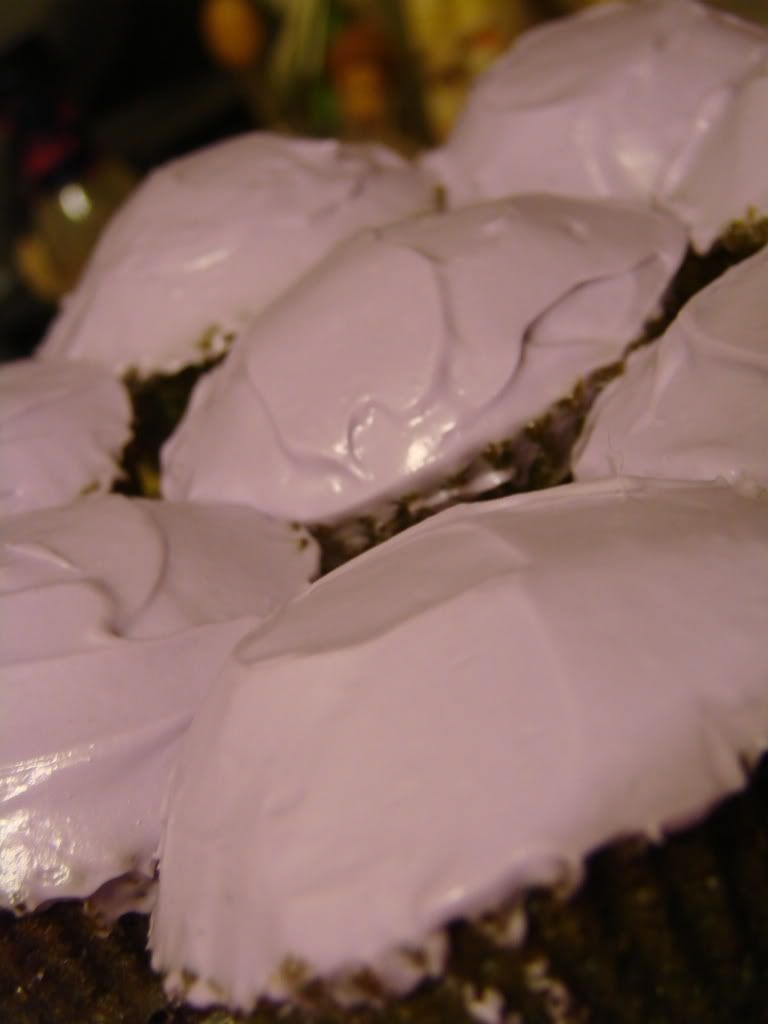
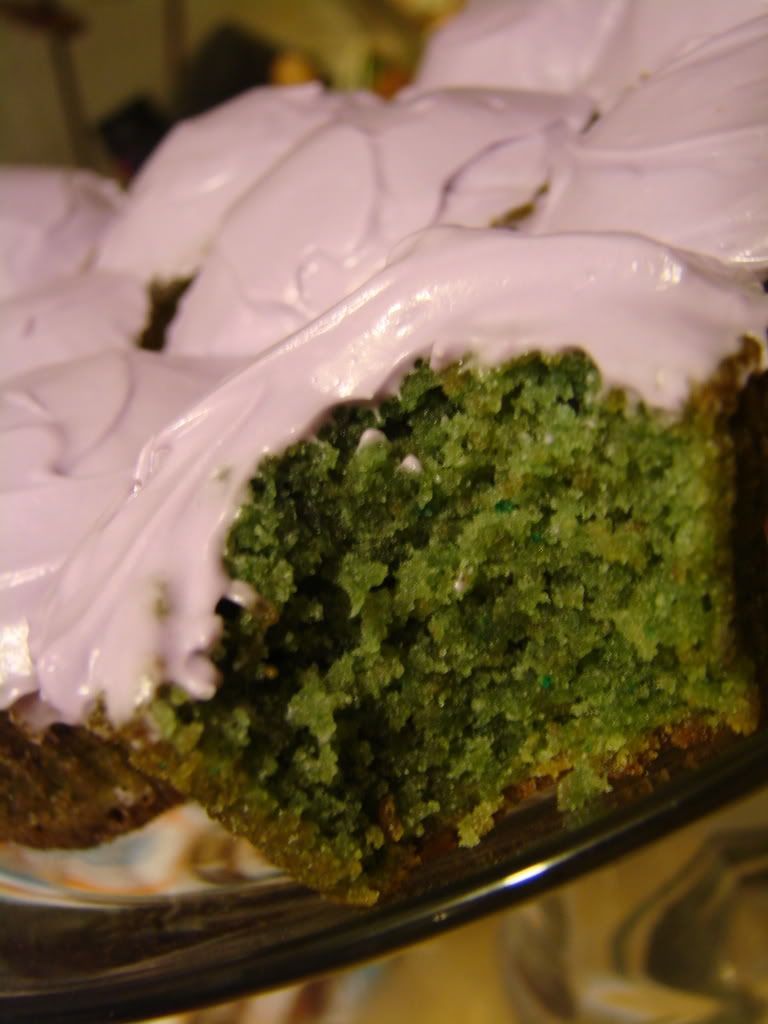 NOTE: The pic makes them look much more green and much darker than they actually are
Velvet Cupcakes
Ingredients:
2.5 c plain flour
1 c buttermilk
1.5 c sugar
2c oil
1 t baking soda
1 t vinegar
1 t salt
2 t cocoa
1 t vanilla
1 T red food coloring
2 eggs
Cooking instructions:
Cream sugar and oil
Sift flour, salt and baking soda and mix with cocoa, vinegar, and eggs.
Add flour mixture to the creamed sugar alternately with buttermilk.
Stir in vanilla and food coloring.
Bake at 350 for 35 minutes.
Ice with homemade cream cheese frosting. (see below for recipe)
 I was supposed to frost one of them with a Prince logo in honor of Rach's name for the cupcakes. I even made teal frosting, BUT Puddles decided she wanted some and she got into the bowl before I could frost the Rachcake.
Cream Cheese Frosting
Ingredients:
1 pound cream cheese, softened
2 sticks butter, softened
1 teaspoon vanilla extract
4 cups sifted confectioners’ sugar
Cooking instructions:
In a large mixing bowl, beat the cream cheese, butter and vanilla together until smooth.
Add the sugar and on low speed, beat until incorporated.
Increase the speed to high and mix until very light and fluffy.
Sour Patch Kids!?!?!
So I know that you can make just about anything homemade, case in point are the marshmallows, but Sour Patch Kids?!?! These have just jumped themselves up to #1 on my list of things to try next. I luv sour patch kids.
Everything below is stolen word for word from dirt-cake
 First you must make pâté de fruit, which is essentially sweetened and gelled fruit juice. I prefer using Vitpris, a type of french pectin, but apple pectin works fine.
Pâté De Fruit
Fruit Puree 2200g
Sugar 1500g
Sugar 300g
Vitpris 300g
Citric Acid 1/2 tsp
1. Bring the Puree and 1500g of sugar to a boil.
2. Mix together the 300g of sugar and the 300g of pectin. Slowly sprinkle the pectin mixture into the puree, whisking constantly.
3. Continue to cook until puree has thickened. Test a small amount of mixture for doneness by making a teaspoon size mound on a cold plate. If the mixture is still extremely tacky keep cooking. If the mixture is only slightly tacky it is ready.
4. Turn off the heat and sprinkle in the citric acid. Stir to distribute evenly.
5. Pour onto a plastic lined halfsheet and cool.
So now you have your glorious cooled pâté de fruits!! A word on types of fruit puree. Bananas and pineapples have an enzyme in their flesh that counteracts the gelling caused by heating pectin. I have used banana in combination with another fruit puree and it has just taken more pectin to make it gel, but nevertheless now you know!! and knowing is half the battle...
Cut your pâté de fruit into whatever shapes you desire. Usually I toss pâté de fruit in organic sugar before adding them to cookie plates. I find that granulated sugar is too small of a sugar crystal, and sanding sugar is too large of a sugar crystal for coating the gelees. Organic sugar falls right in the middle and works nicely. For the sour part I take a teaspoon of citric acid and add organic sugar to taste. A little really goes a LONG way as I found on my first trial dredge in the sour mix was WAY too sour! (sorry to all of my testers!) Once you have found your sour balance toss your pâté de fruit and serve!!
note: Don't toss all of your pâté de fruits in sugar if you aren't going to use them immediately. The sugar tends to pull moisture from the pâté de fruits and makes a sugary syrup that I wouldn't call camera ready!
Chili and Corn Bread
Last night Greg had two friends come over after work. Three hungry boys seemed like a great night to make the chili and corn bread I've been craving all week. I love chili and have been craving it because it's finally starting to feel like fall and chili and cool weather go perfectly. Needless to say it was a hit, they all loved it and the boys were happy to enjoy a nice home cooked meal because boys living with other boys don't often get that luxury.
Lisa's (MIL) Chili
ground beef
2 cans black beans
2 cans Del Monte tomatoes with jalapenos (I just used crushed tomatoes last night and threw in a few more jalapenos than usual)
1 green pepper
1 onion
3 packets Chili seasoning
1 bottle of beer
If you want it a little hotter add some cayanne pepper and extra jalapenos
-Chop the green pepper and onion and throw them in a pan with the beef.
-Brown the ground beef (the pepper and onion should have enough time to soften up while your browning the beef ... if you're worried you can cook them in some EVOO on their own)
-Put the browned beef, onions and green peppers in a pot and add the black beans, tomatoes, chili seasoning and a bottle of beer
-cook until hot and the strong beer flavor is gone
Sweet Corn Bread
Stolen From allrecipes.com
INGREDIENTS
- 1 cup all-purpose flour
- 1 cup cornmeal
- 1/4 cup sugar
- 1/2 teaspoon baking powder
- 1/2 teaspoon baking soda
- 1/2 teaspoon salt
- 1 egg, lightly beaten
- 1 cup sour cream
- 1/3 cup milk
- 1/4 cup butter, melted
- In a large bowl, combine the flour, cornmeal, sugar, baking powder, baking soda and salt. Combine the egg, sour cream, milk and butter; stir into dry ingredients just until moistened.
- Pour into a greased 8-in. square baking dish. Bake at 400 degrees F for 20-25 minutes or until a toothpick inserted near the center comes out clean. Serve warm.
Saturday, October 13, 2007
OMG
So, I'm planning on doing a bunch of cooking/baking today and was at the grocery store stocking up on everything I would need. While I was wondering around the bread aisle I saw my absolute fav bad for you frozen food ever (frozen chicken fingers, fries and such are at the end of the bread aisle ... why you ask? Not a damn clue) ... State Fair Corn Dogs. I haven't had these things since my sophomore year of college (the only year I went grocery shopping for myself). Semi off topic ... the reason I made my Mom drive into the Boston to visit me with groceries after that is because the closest grocery store was about a good 10-15 min walk from my apt. My ex and I used to go grocery shopping and walk the shopping cart home because I wasn't going to pay $7 for a cab ride home and well, we could. BUT after that year they built a new store and along with the new store came the shopping carts that would lock when you went past the line around the store. Apparently I wasn't the only one walking my shopping cart home. I wasn't going to walk $200 worth of groceries home and the cab ride was still more than I wanted to pay. I tried peapod a few times, but they didn't have everything I wanted and so it was Mom to the rescue. Eventually I forgot about my beloved corn dogs, until today when they stopped me dead in my tracks and screamed to my shopping cart to take me home with them. Anyway, I bought some and they're still as horribly good as I remember them being.

mmm Pizza

Last night I planned on making Chili. It's finally starting to feel like fall and I was in the mood for something warm. After work I stopped by Trader Joe's and quickly changed my mind. They had some of their garlic and basil pizza dough out and I knew right away that my plans were changing and it was pizza night. Making your own pizza dough isn't hard and I could probably mimik their garlic and basil dough pretty easily, but I was hungry and didn't want to deal with waiting for dough to rise, plus it's cheap enough that it's easy enough to justify buying this yummy premade goodness instead of making my own. When TJ's has this dough I always buy the braided marinated mozarella to go with it. The marinated mozzarella is more expensive than the big bags of the cheapie shredded stuff, but when you combine it with the garlic and basil dough it's heavenly. Who am I kidding, I love marinated mozzarella and could eat it all night long and any excuse to buy some is good enough for me.
I'm a fan of good 'ole cheese pizza, I almost never put toppings on it and if I do, it's usually just pineapple. TJ's didn't have any pineapples and I wasn't going to make another grocery store stop so, cheese it was.
I got home, opened my new Pampered Chef pizza stone (thank you Bubba Lucky (my cat) for breaking my old one ... you owe me about $30) and was ready to go. I threw some flour on it, spread the dough out and threw it in the oven at about 325 degrees ... with my old ass gas stove it's always about. Usually I leave it in for about 10-15 mins to make sure the dough cooks before putting the toppings on. My friends wonder why their dough is never fully cooked ... well sillies it's because the toppings heat faster than the dough. Then I made the sauce.
Pizza Sauce (FYI this makes way too much so you may want to freeze it in cupcake tins so you have it for the next time you make pizza)
1 can crushed tomatoes
2 cans tomato paste
a bunch of oregano and italian seasoning
a little salt and pepper
a little sugar (I had confectioners sugar out so I just used that ... yes I know, I'm a freak)
some olive oil
4 cloves of garlic (I love garlic! If you don't think it should be a major food group use less)
Just mix it up, taste and you're good to go
So, after making my sauce, I checked the dough and it still needed a few more minutes so I went into the other room to watch the Red Sox game that Greg and Brady were watching without me. Of course I got sucked in and forgot about my dough. When I finally got around to checking my dough it wasn't burnt, but it was getting there and if I put the sauce and cheese on now it was going to be burnt by the time the cheese melted. Instead of risking it, I tossed it. Luckily I was smart and bought 2 bags of dough. So I started over and made sure to remember to check on it this time (I made them pause the game in the middle of Ortiz's at bat because I didn't want to miss any of the game, but knew I needed to pay attention to the dough this time). Perfect timing, my dough was ready, I threw on some sauce and the cheese and tossed it back in the oven. I also turned down the oven to about 200 because the dough was done, I just needed to heat the sauce and melt the cheese. In about 5-10 mins it was done and boy oh boy was it delish. I just kept eating and eating and eating ... Greg ate and ate, then paused for a piece of cake and went back for one last slice of pizza.
I had pizza for breakfast this morning and have one slice left that I promise to take a pic of before I eat it for lunch ;)
Update
So I haven't been cooking much. Last week I was really busy and this week I was really tired after Vegas ... waking up at 4:30am twice in one week (back to back days to be exact) and getting most of my sleep on planes wiped me out.
Earlier this week I made cheesy mac n' eggs, but it wasn't until I was half was done cooking that I realized the last of my big bag of cheddar cheese had gone bad and I was stuck using some mexican blend. Now, I probably could have made it work if I could have gone all out with the mexican theme, but when you're in dire need of grocery shopping some things just aren't possible. Oh and did I mention that I nicely sliced my finger while trying to open the bag of mexican cheese? Yet another reason why I wasn't in the mood to repair dinner. I was stuck holding a paper towel on my finger the whole time I cooked and it wasn't until well after we ate that it finally stopped.
To make up for my dinner disaster i decided to make Hershey's Chocolate cake...
Sunday, September 30, 2007
Saturday, September 29, 2007
Homemade Marshmallows

I first saw these about a month ago on the Baking Bits blog and I planned on making them when we opened up our hot chocolate we got on our honeymoon. We'll with the fair starting this weekend I knew it was prime time to make some marshmallows and hot chocolate even if it is still 80 degrees most of the time. These made a TON of marshmallows. The other guesses are around 36, but I cut the main square into 36 and then cut each of those 36 in half and the marshmallows were still pretty big. I plan on leaving some of them out and throwing the rest in the freezer so I have yummy marshmallows all winter long yum.

Stolen from Baking Bits
Homemade Marshmallows
.75-oz unflavored gelatin (3 envelopes of Knox gelatin)
1/2 cup cold water
2 cups granulated sugar
2/3 cups light corn syrup
1/4 cup water
1/4 teaspoon salt
1 tablespoon vanilla extract
Line 9 x 9-inch pan with plastic wrap and lightly oil it. Set aside.
In the bowl of an electric mixer, sprinkle gelatin over 1/2 cup cold water. Soak for about 10 minutes.
Meanwhile, combine sugar, corn syrup and 1/4 cup water in a small saucepan. Bring the mixture to a rapid boil and boil hard for 1 minute.
Pour the boiling syrup into soaked gelatin and turn on the mixer, using the whisk attachment, to high speed. Add the salt and beat for 12 minutes. After 12 minutes, add in the vanilla extract beat to incorporate.
Scrape marshmallow into the prepared pan and spread evenly (Lightly greasing your hands and the spatula helps a lot here). Take another piece of lightly oiled plastic wrap and press lightly on top of the marshmallow, creating a seal. Let mixture sit for a few hours, or overnight, until cooled and firmly set.
In a shallow dish, combine equal parts cornstarch and confectioners’ sugar. Remove marshmallow from pan and cut into equal pieces with scissors (the best tool for the job) or a chef’s knife. Dredge each piece of marshmallow in confectioners’ sugar mixture.
Store in an airtight container.
What to buy next?
So, I've been wondering around cooking blogs tonight because Greg passed out after our midnight walk/tug of war with Puddles and of course, they had to lead me to a new place Kitchenkrafts.com to buy more pans that, while I don't need, I really really really want to have and I may just need to get them before they're discontinued (I'm just going to pretend that the cupcake pan doesn't say "New!" )
I've been eyeing this cupcake pan since it came out (yes, I buy the Wilton yearbooks and drool over all the new things to buy). I don't think there's any way out of it, I'm getting this pan, it's just a matter of when and my crystal ball says soon!
Update: The place that makes them has recipes too and apparently they're pretty popular because they're not even offering different shipping options in an effort to get orders out ASAP
Does it make sense to anyone else that I should buy both pans and save on shipping? Makes perfect sense to me ... I'll sleep on it and buy them tomorrow :P

Chocolate Roses
A year and a half ago I took 2 Wilton Cake decorating classes and a few other classes along the way. One of my favorite classes was the edible flower class. We learned to make flowers on lolly pop stick. You can let them dry and they will last forever or until your cat knocks them over as was the case with the ones I made. Ok maybe not forever, but Maxine, our teacher had ones from over a year before that still looked great.
The fondant ones are pretty, but lets be honest, fondant tastes like yuck. One of the woman's hubbies was waiting for her watching and we convinced him to try some. Spit it out like a little kid trying asparagus for the first time (who am I kidding, I still spit that crap out). The colors are pretty, but fondant can be a pain to work with and what fun is making something if you can't taste test along the way?
The chocolate ones on the other hand are pretty and yummy all at the same time. Ever wonder how to make tootsie rolls, follow this recipe and don't make them into flowers. They're as close to tootsie rolls as you're gonna get. So, my recipe is scribbled on a torn out piece of someone elses notebook paper and while I could follow it because it's so easy, I still can't figure out why at the bottom I randomly wrote "gum tex 1/2 teaspoon." I can only guess that this is what you add to the fondant, but how much fondant? You're guess is as good as mine because there is no direct mention of fondant and the top says "Chocolate Flowers." Ahh the joys of scribbling recipes while your trying to learn and make the stuff in a limited amount of time.
So ... I found a far more detailed recipe than 1pkg chocolate waffers, 1/3 cup corn syrup, melt, mix and put on wax paper. While that explains it, the recipe below stolen from Whatscookingamerica.net is a little more detailed to say the least. And the directions are far better than the "make a blob with a point on the top" instructions I wrote down. So... here you go. I'll post my own pics tomorrow after I make them.
But, before I do ... wanna see my Care Bears Cake I made in our buttercream fondant class?
Note: please ignore the heart on the nose. I was struggling with the heart and Maxine came in and turned it into an off center heart with a rodolf dot next to it.
Chocolate Clay Roses

10 ounces semisweet chocolate (coarsely chopped chunks or chips)
1/3 cup light corn syrup
In a shallow bowl, melt the chocolate in microwave for 2 minutes; stir. NOTE: Be careful so that the temperature does not exceed 100 degrees F. If chocolate is not completely melted, return to microwave for 30 seconds at a time and stir until smooth.
Add corn syrup to the chocolate and mix well (scrape all the corn syrup into the chocolate with a rubber spatula). Using a rubber spatula, stir and fold mixture, scraping the sides and bottom of the bowl well, until no shiny syrup is visible and the mixture forms a thick ball. Pour mixture onto a waxed paper sheet and spread with the spatula until it's about 1/2-inch thick; let it sit and stiffen, uncovered, for about 2 hours. Use at once or store in an airtight container at room temperature for up to 1 month.
Making Chocolate Roses:
Knead a handful of clay at a time on a work surface until it is soft and pliable like Play-Doh.
Roll dough into (12) twelve 1/2-inch diameter balls of clay. Place the balls on waxed paper or plastic wrap about 1-inch apart. Using your fingers, press in the center and then on either side, flattening the disk into 1-inch flat disks about the size of a quarter (leave the top edge thin than and bottom edge. Repeat with the remaining disks.

NOTE: If the clay balls or petals become too soft from your body heat, let sit at room temperature for at least 10 minutes. To periodically cool you hands, grasp a cold glass. (this does become a problem so keep this in mind ... one of the girls hands were so warm she simply could not work with the chocolate)
Roses will harden after a few days and can be saved by storing in a cool, dry place.
NOTE: To make larger roses, make larger chocolate clay balls.
Friday, September 28, 2007
Chicken Parm
I wasn't feeling too good tonight so and was craving chicken parm since Clara made it. I <3 chicken parm sooooo much!! Greg offered to make anything I wanted so I gave him the recipe and said go for it. He did a great job! Even Puddles liked it enough to try to steal the scraps
Stolen from Jessi and Clara
Chicken Parm
Ingredients:
Boneless Chicken breasts or chicken strips
1 egg beaten
1/2 cup breadcrumbs
1/4 cup garlic powder
1/2 cup parmisan cheese (this is Greg's best guess)
Italian Seasoning
marinara sauce
shredded mozzarella cheese
Cooking Instructions:
>Preheat oven to 350 degrees.
>Mix bread crumbs, parmesan cheese, garlic powder and Italian seasoning in a bowl
> Rinse chicken breasts and dunk in beaten eggs
> Cover with bread crumb mixture
> Cook for 30 minutes
>Top with sauce and put back in the oven for another 10 minutes
>Add Mozarella and cook for five more minutes


Thursday, September 27, 2007
Spaghetti Sauce
In an effort to get Clara to cook without a strict recipe, I bring you my spaghetti sauce. I don't think it ever turns out the same way twice, it all depends on how I'm feeling that day and what and how much I feel like throwing in.
2 cans crushed tomatoes (tomato puree works too, but the sauce burps more)
2 cans tomato paste
bay leaves (take out after cooking)
oregano
parsley
Basil
italian seasoning
garlic and lots of it
a little EVOO
a little white wine
ground beef mmm meat sauce (brown the meat before putting it in)
A whole onion (I cut it into big chunks because I'm not a huge fan of eating onions, but I like the flavor)
salt
pepper
Good Luck Clara
Pumpkin Bread!
In honor of my combination pumpkin and baking phases, I decided to make some pumpkin bread. Tomorrow night I'm planning on making pumpkin ravioli, but Greg took too long to get to the store for me to make the raviolis tonight soooooo I settled for pumpkin bread. It's in the oven now so I'll update you later to tell you how amazing it it (you know it's going to be good) and I promise to take pics, which reminds me I still need to put the pics of last weeks cookie craze up.
I got this recipe from nestie bakingblond, I have no idea where she got it
Pumpkin Bread
1/2 cup oil (canola or vegetable) - I used vegetable
1 1/4 cups canned pumpkin puree (NOT pumpkin pie filling) ehh I used pumpkin pie filling because that's what I had
1 cup white sugar
1/3 cup brown sugar
2 eggs
1-1/2 cups and 1 tablespoon all-purpose flour
1/2 tsp baking soda
1/2 tsp baking powder
1/2 tsp salt
1 tsp cinnamon
1/4 tsp ground cloves
1/2 tsp ground nutmeg
1/2 cup toasted chopped nuts (optional, like pecans or walnuts)

Preheat the oven to 350 degrees
Lightly spray with PAM (or grease and flour) a loaf pan.
In a large bowl wisk together the flour, baking soda, baking powder, salt, cinnamon, cloves and nutmet. Set aside.
In a medium size mixing bowl, mix together the oil, pumpkin, sugar, brown sugar and eggs until combined. Carefully mix in the flour mixture and stir until well blended. (fold in nuts if using)
Gently pour and spread the battter evenly into prepared loaf pan.
Bake in preheated oven for 40-60 mintues or until the top of the loaf springs back slightly when gently pressed. Cool in pan for 10-20 minutes and transfer to rack to cool completely.
Saturday, September 22, 2007
Cookies, Cookies and more Cookies
I have no idea what got into me, but tonight was all about Cookies!! I just kept making them and making them with no end in site. Maybe it's because AF is coming next week, but I only actually ate 1 cookie and I had a bite of each of the different cookies, so that doesn't make sense. Oh well, Greg is happy.
Tonight I made, BBFCCCC (aka Big ole Chocolate Chip Cookies), the Best Peanut Butter Cookies and Glazed Pumpkin cookies in honor of fall coming. Who am I kidding I was cleaning the pantry and saw pumpkin puree that I had an itch to use.
All in all the cookies were very good.
The BBFFCCCC's looked the best and tasted amazing.
The peanut butter cookies ended up a wee bit flat, but tasted devine (hehe I never say devine ... it makes me feel like a snooty old lady wearing a fur). You also couldn't see my fork cross, but that's probably because I forgot to do it and did it half way through the cooking time.. I was aready onto my next batch of cookies so I was a little consumed with other things.
My first batch of Glazed pumpkin cookies were a little round, I forgot to flatten them before throwing them in, like the criss cross fork marks on the PB cookies, I was already thinking about my glaze while putting the cookies on the sheet. I only had a bite, but they were very yummy and who doesn't like a pretty glazed cookie?
All the recipes are below
Subscribe to:
Posts (Atom)
Blogger port by Blogger Templates
Visionary theme by Justin Tadlock

